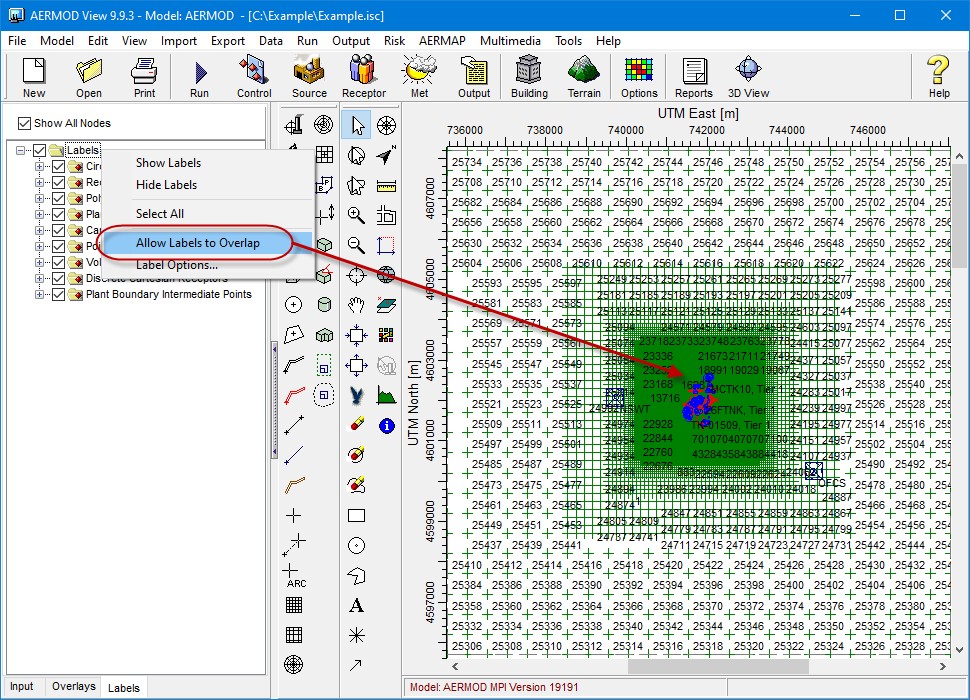
When working with Lakes Environmental Software applications, the drawing area affords users a lot of flexibility in how they add and visualize their project components. One way for users to make sense of the objects is to include object labels. These are controlled via the Labels tab on the Tree View.
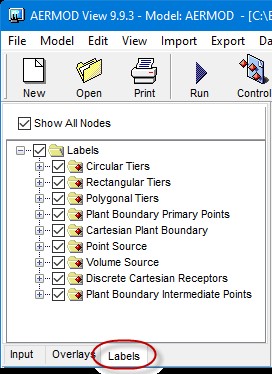
From this tab, users can control which labels are displayed in the main drawing area. There are several important features to this tab:
Step 1: The master Labels checkbox must be selected in order for any labels to be shown.
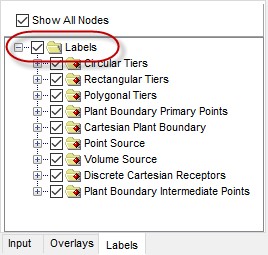
Step 2: The Show All Nodes feature applies to object types that may contain a lot of individual components (e.g., discrete receptors). By selecting this option, labels for every object will appear instead of limiting the labels to the first 1000 objects.
Step 3: Right-click anywhere in the tab to pull up the context menu options. The Allow Labels to Overlap option is enabled by default but can make visualization difficult when there are many objects. Uncheck this to allow the application to only display a few labels at a time.
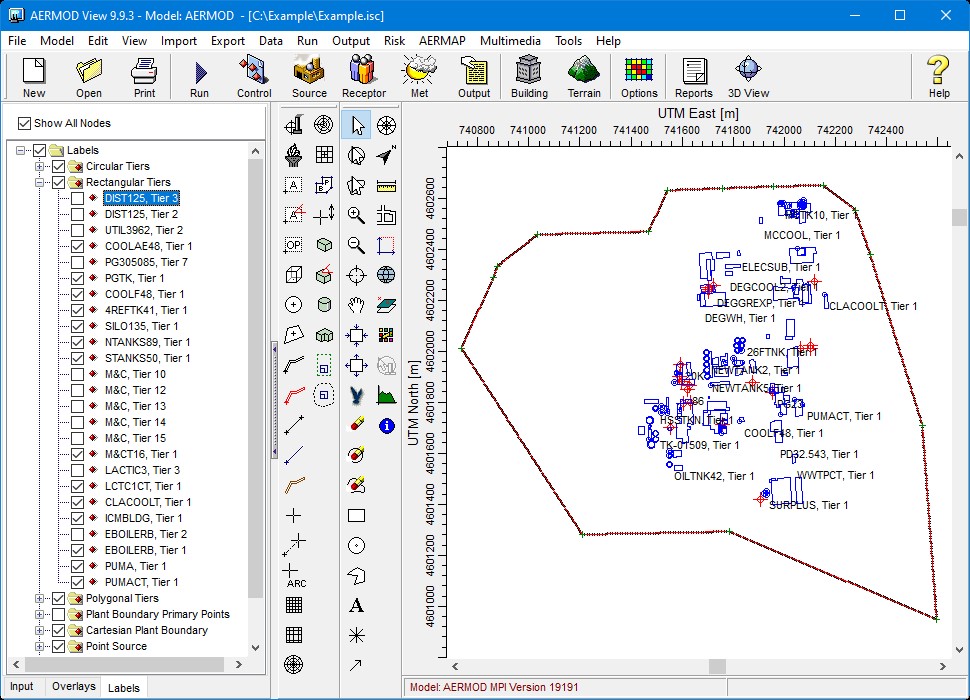
Step 4: Each object’s label can be controlled individually. Expand the object type to see each model object. You can then enable (check) or disable (uncheck) individual objects you do not want to display. In the example below, certain building tier labels have been disabled since they all represent a single structure.
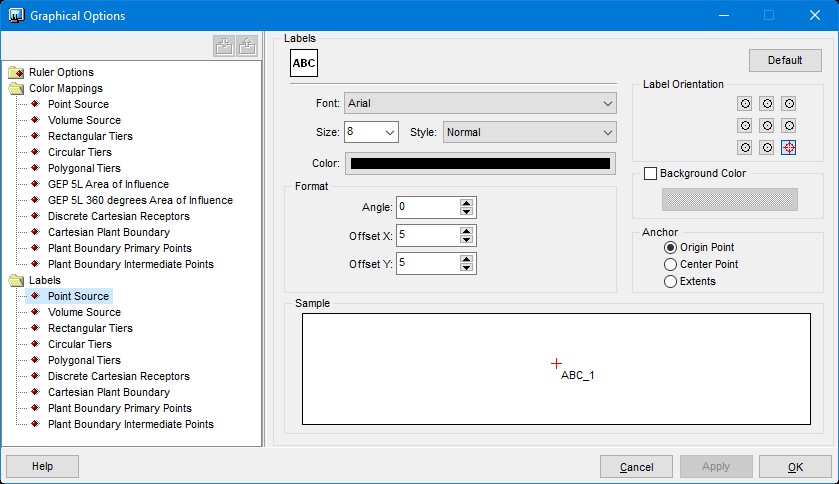
Step 5: The look of the labels can also be customized through the Graphical Options settings. Either use the Label Options selection from the context menu or click the Options tool button and scroll to the Labels settings. Selections include the font, size, color, and placement.