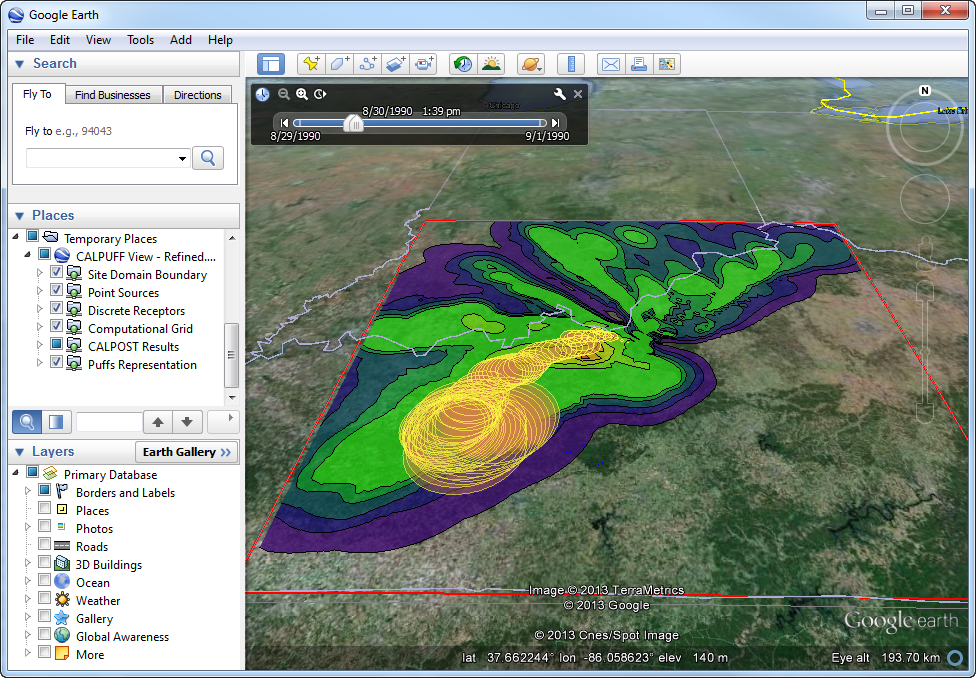
CALPUFF is an air dispersion model that advects ‘puffs’ of material emitted from modeled sources, simulating dispersion and transformation processes along the way. These puffs can be displayed graphically using debug information written to the main CALPUFF output file (CALPUFF.LST). With CALPUFF View, modelers can visualize puffs as animations in Google Earth.
NOTE: The Puff Tracking option produces a very large CALPUFF.LST file that can reach many gigabytes in size. Therefore, you should set the modeling period for this option to a small number of days in case the CALPUFF model is being run for a longer period of time.
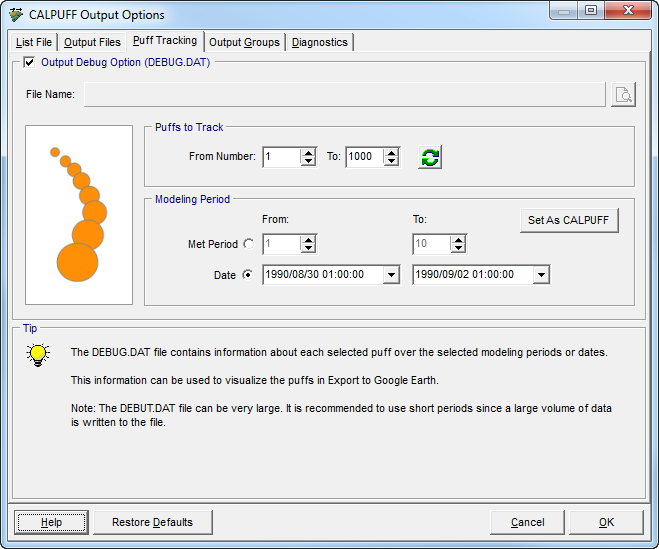
Setup Puff Tracking
Step 1: Select the menu option CALPUFF | Output Options and then click on the Puff Tracking tab.
Step 2: Check the box for the Output Debug Option (DEBUG.DAT) to write puff parameters to the output file.
Step 3: Specify the number of Puffs to Track. If more puffs are emitted in the modeling period than the number tracked, the animation will stop upon reaching the highest tracking number.
Step 4: Identify the Modeling Period. You can select the date in YYY/MM/DD HH:MM:SS format or select how many Met Periods to process. Period length depends upon the Time Step selected in the CALPUFF | Run Information options. For example, if your time step is 3600 seconds (1 hour), then each Met Period represents a single hour.
After successfully completing a CALPUFF model run, the puffs can be exported for animation.
Animating Puffs
Step 1: Select Export | Google Earth… from the menu.
Step 2: Select the folder in which to save the KML files; by default, the folder is named <projectName>.KML, and is located inside the project folder. To change this, select the Select Folder button () and specify a new location.
Step 3: In the Layers to Export list, make sure the Puffs Representation layer is checked. Leave checked any other layers that you wish to include in the exported KML file. Click the checkbox to uncheck any layers that you do not wish to include.
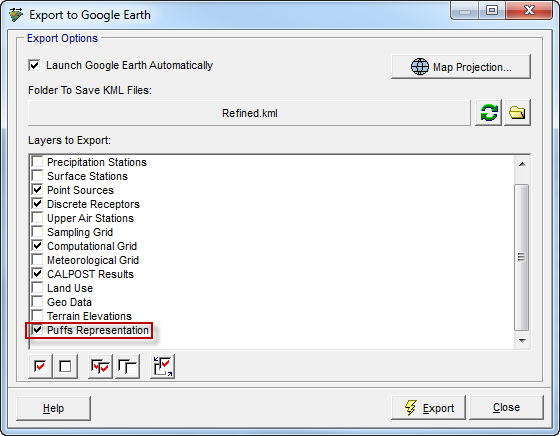
Step 4: Click the Export button. If the Launch Google Earth Automatically option is selected and Google Earth is installed on your computer, the program will begin loading.
Step 5: The Google Earth application opens displaying all the CALPUFF View layers for your project. To start the Puff Tracking animation, you need to press the button. For animation settings, press the
button.