A key feature of Lakes Software’s commercial products is the ability to easily import base maps in a wide variety of file formats. Supported formats include raster images (e.g., JPG, BMP, PNG, GIF, etc.), AutoCAD DXF, Digital Line Graphs (DLG), Shapefiles, and more.
One of the supported formats – shapefiles – can be very useful because, in addition to geographic location data, they can also store associated attribute information. Because these files are georeferenced, it is important that they are properly identified when importing them into applications like AERMOD View and CALPUFF View.
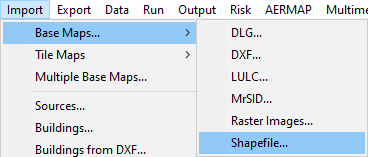
When importing a shapefile, start by using the Import | Base Maps | Shapefile menu option.
This will open the Import ArcView Shapefile dialog. Use the Open File button to locate the shapefile that you want to import. Having opened the file, note the Shapefile Coordinate System field in the bottom right. This field is used to define the map projection of the shapefile.
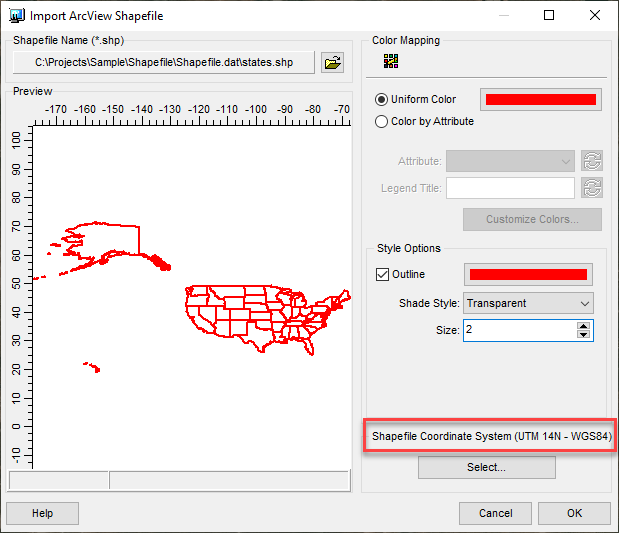
Note that it defaults to the project’s defined projection. In the above example, the shapefile uses Latitude / Longitude coordinates which differs from the project’s use of Universal Transverse Mercator. To modify the coordinate system of the shapefile, press the Select button to open the Select Projection dialog.
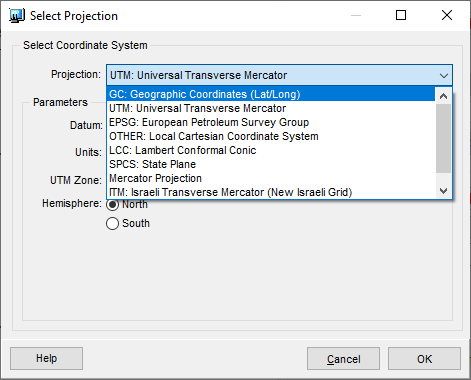
Expand the Projection drop-down menu and choose the appropriate projection from the list. In this case, we choose GC: Geographic Coordinates (Lat/Long) to correctly identify the shapefile’s projection. Click OK in both dialogs to close them.
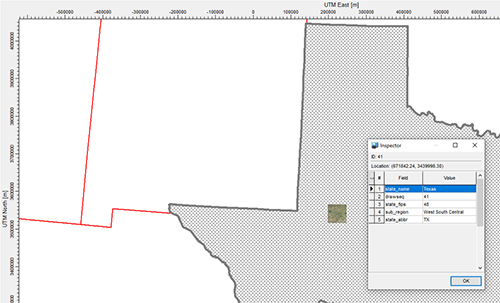
The imported shapefile is automatically converted to the project’s coordinate system. Individual items from the shapefile can then be selected and their attributes identified using the Inspect context menu command.